Here’s a simple tutorial for using a relay without a microcontroller, controlling it with a battery and a bulb/LED.
Materials Required:
- Relay (5V or 12V depending on your battery)
- Battery (of a voltage matching the relay coil, e.g., 5V or 12V)
- Bulb/LED (match the voltage of your secondary circuit)
- Resistor (if using an LED, typically 220Ω for a 5V circuit)
- Switch or Wire (to control the relay)
- Connecting Wires
Understanding the Relay:
A relay is an electrically operated switch that uses an electromagnetic coil to mechanically control a switch.
- Coil Pins: Two pins to activate the relay (e.g., IN+ and IN- or marked A and B).
- Common (COM): Connected to the load (bulb/LED).
- Normally Open (NO): Circuit is open when the relay is inactive; closes when the relay is activated.
- Normally Closed (NC): Circuit is closed when the relay is inactive; opens when the relay is activated.
Wiring Steps for Relay without Microcontroller:
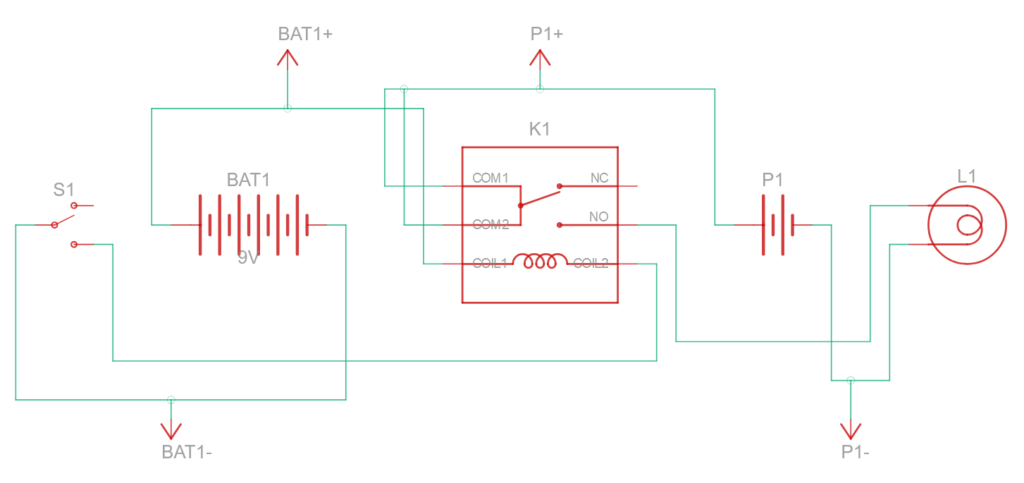
1. Connect the Coil of the Relay
- Relay Coil Pins: Find the two pins connected to the coil. These will activate the relay when powered.
- Connect the positive terminal of the battery to one of the coil pins.
- Connect a switch or simply a wire from the negative terminal of the battery to the other coil pin.
- This forms a circuit for activating the relay.
2. Connect the Load (Bulb/LED)
- Identify the COM and NO (or NC) pins on the relay.
- Connect the positive terminal of the external power supply for the bulb/LED to the COM pin.
- Connect the positive wire of the bulb/LED to the NO pin (if you want it to turn on when the relay is activated).
- For the negative wire of the bulb/LED, connect it back to the negative terminal of the external power source.

3. Test the Relay
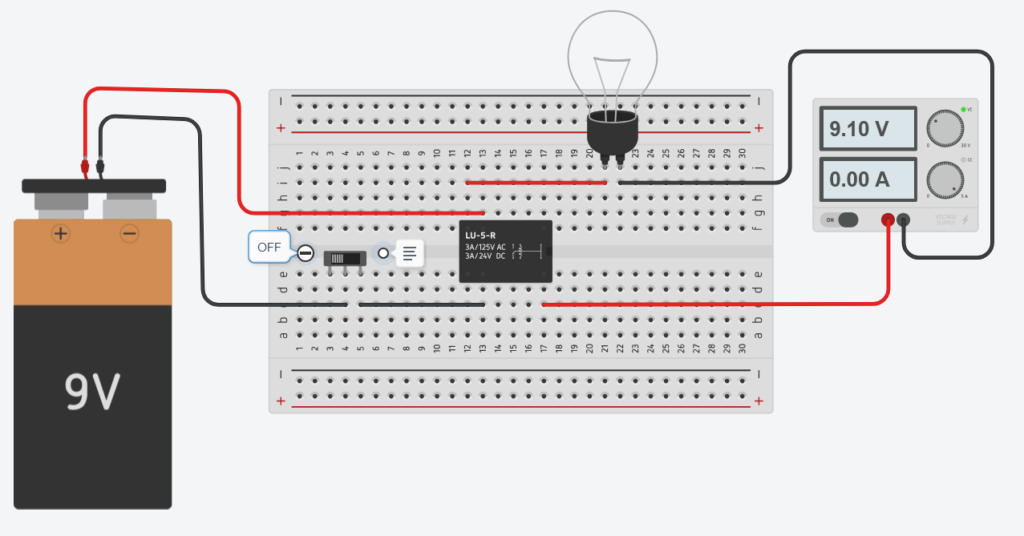
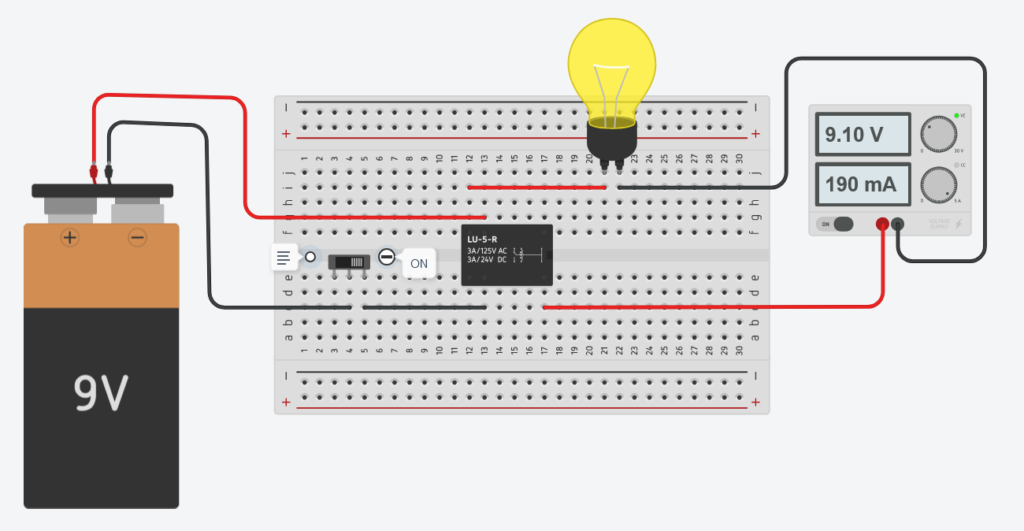
- Close the switch or touch the wire to complete the coil circuit. This should activate the relay.
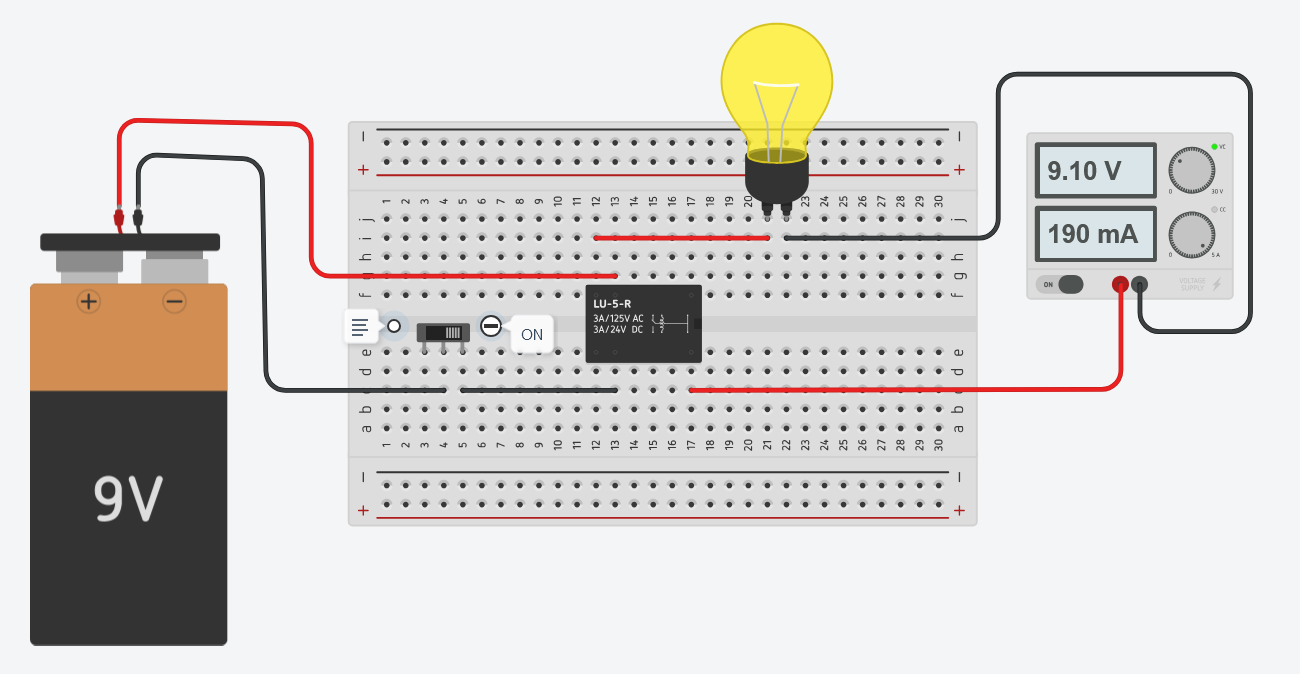
- When the relay is activated, the NO pin connects to COM, turning on the bulb/LED.
- Open the switch to deactivate the relay, which turns the bulb/LED off.


Example Diagram:
[Battery (+)] ----> [Relay Coil Pin 1]
[Battery (-)] ----> [Switch] ----> [Relay Coil Pin 2]

External Power Source:
[COM] ----> [Positive of Power Source]
[NO] ----> [Bulb/LED Positive]
[Bulb/LED Negative] ----> [Negative of Power Source]
Important Notes:
- Ensure the relay’s coil voltage matches your battery voltage.
- If using an LED, add a resistor in series with the LED to prevent it from burning out.
- Handle the relay carefully if using high-voltage loads.


This article explains how a relay functions as an electrically operated switch using an electromagnetic coil. It’s fascinating how such a simple mechanism can control more complex circuits. Relays are widely used in various applications, from automotive systems to industrial machinery. Understanding their operation is crucial for anyone working with electrical systems. Do relays have any limitations in terms of switching speed or durability?