Introduction
The MD30-60 Thin Film Pressure Sensor (FSR) is a flexible and highly sensitive force sensor used in various applications such as robotics, medical instruments, and interactive controls. This sensor can detect force variations up to 20kg and has a fast response time, making it suitable for real-time pressure measurements. When integrated with an Arduino, it can be used for weight measurement, touch sensitivity, or automated control systems.
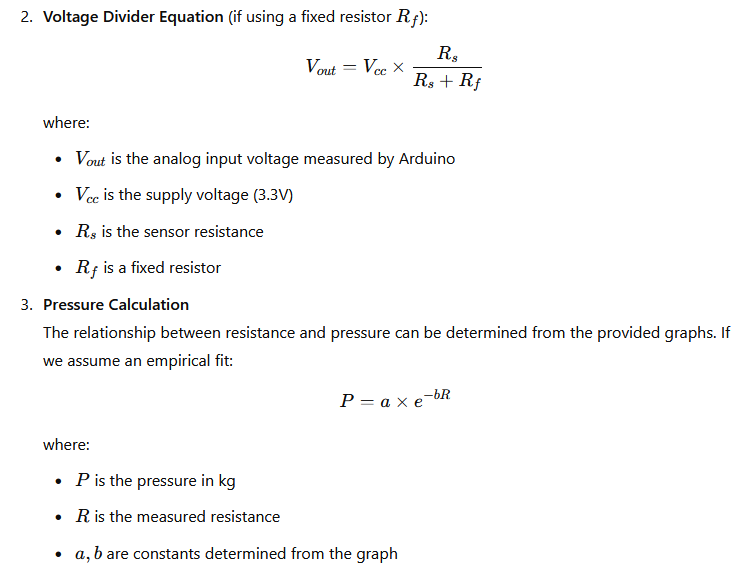
This blog will cover the working principle of the MD30-60 sensor, calculations, circuit diagrams, and multiple Arduino codes for different use cases.
1. How Force Sensor Works (Working Principle of MD30-60 Thin Film Pressure Sensor)
The MD30-60 sensor operates by changing its resistance when pressure is applied. The sensor consists of a pressure-sensitive resistive material between two conductive layers. When force is applied, the resistance decreases, leading to a voltage variation that can be read by an Arduino.
Key Characteristics:
- Resistance varies inversely with applied force.
- Non-linear response as shown in the datasheet curves.
- Can measure forces up to 20kg.
- Response time is <1ms, making it ideal for real-time applications.
2. Circuit Design and Connections (thin film pressure sensor Arduino)
To measure force using an MD30-60 FSR with Arduino, a voltage divider circuit is required.
Components Required:
- MD30-60 Thin Film Pressure Sensor
- Arduino Uno
- 10kΩ Resistor
- Breadboard & Jumper Wires
Circuit Diagram:
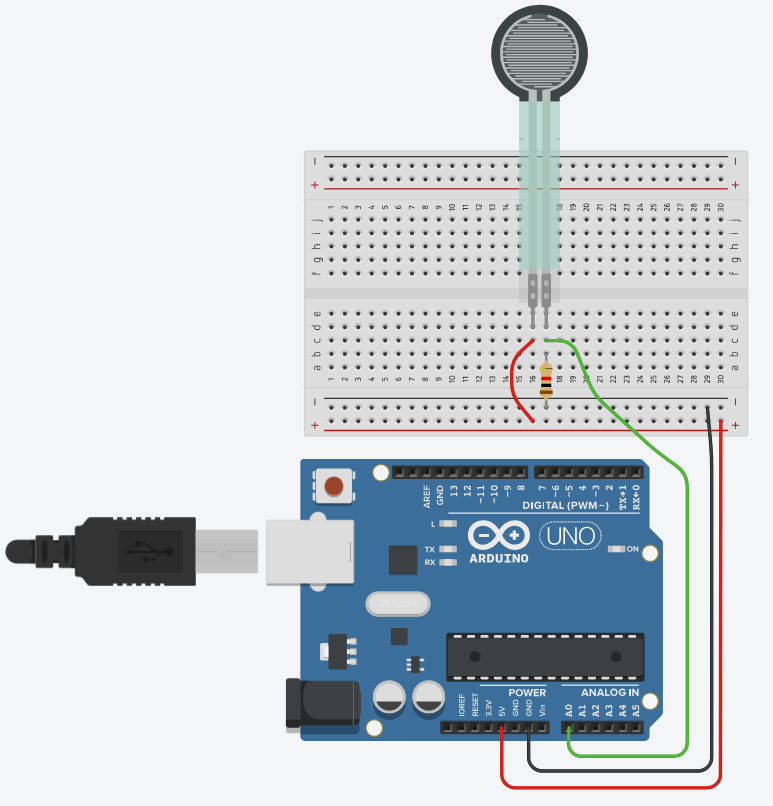
Connections:
- One terminal of the MD30-60 sensor is connected to 5V of the Arduino.
- The other terminal is connected to:
- One end of a 10kΩ resistor (pull-down resistor) to GND.
- An analog pin (A0) to read voltage variations.
       +5V
        |
        |
       [FSR]
        |
        |----> A0 (Analog Read)
        |
       [10kΩ Resistor]
        |
       GND

3. Arduino Code for Basic Pressure Measurement
This code reads the analog voltage from the sensor and converts it into an estimated force value.
const int fsrPin = A0;
int sensorValue;
float voltage;

void setup() {
    Serial.begin(9600);
}

void loop() {
    sensorValue = analogRead(fsrPin);
    voltage = sensorValue * (5.0 / 1023.0);
    Serial.print("Sensor Value: ");
    Serial.print(sensorValue);
    Serial.print(" | Voltage: ");
    Serial.println(voltage);
    delay(500);
}
4. Estimating Force Applied
To estimate force, we use the resistance equation and a pre-determined calibration curve from the datasheet.
Code for Force Estimation:
const int fsrPin = A0;
int sensorValue;
float resistance, force;

void setup() {
    Serial.begin(9600);
}

void loop() {
    sensorValue = analogRead(fsrPin);
    float voltage = sensorValue * (5.0 / 1023.0);
    resistance = (5.0 - voltage) * 10000 / voltage;  // Voltage Divider Equation

    // Using data from the MD30-60 datasheet graph
    if (resistance > 30000) {
        force = 0;
    } else if (resistance > 10000) {
        force = (30000 - resistance) / 500;  // Approximate for high resistance range
    } else {
        force = (10000 - resistance) / 100;  // Approximate for low resistance range
    }

    Serial.print("Resistance: ");
    Serial.print(resistance);
    Serial.print(" Ohms | Estimated Force: ");
    Serial.print(force);
    Serial.println(" N");
    delay(500);
}
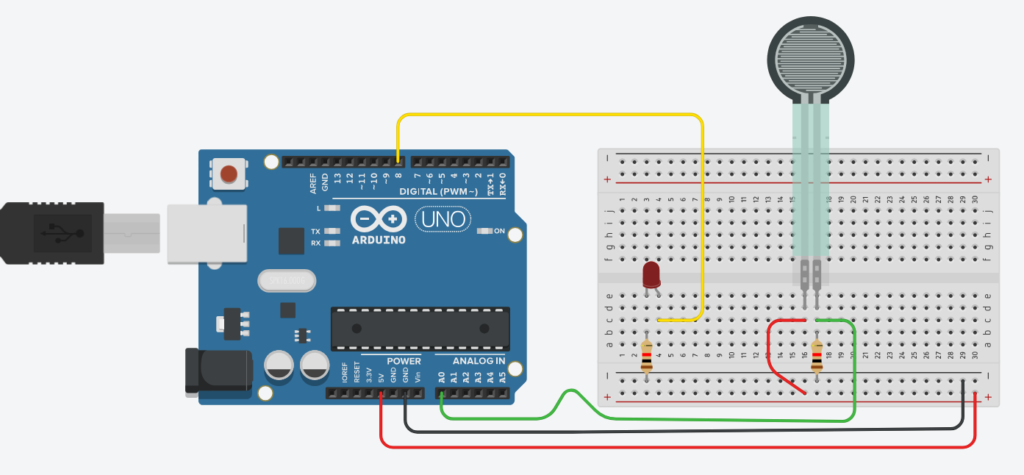
5. Triggering Actions Based on Force Threshold
We can trigger an LED or a buzzer when force exceeds a certain limit.
Code to Turn ON LED when Force > 1N:
const int fsrPin = A0;
const int ledPin = 9;
int sensorValue;
float resistance, force;

void setup() {
    pinMode(ledPin, OUTPUT);
    Serial.begin(9600);
}

void loop() {
    sensorValue = analogRead(fsrPin);
    float voltage = sensorValue * (5.0 / 1023.0);
    resistance = (5.0 - voltage) * 10000 / voltage;

    if (resistance > 30000) {
        force = 0;
    } else if (resistance > 10000) {
        force = (30000 - resistance) / 500;
    } else {
        force = (10000 - resistance) / 100;
    }

    Serial.print("Force: ");
    Serial.println(force);

    if (force > 1.0) {
        digitalWrite(ledPin, HIGH);
    } else {
        digitalWrite(ledPin, LOW);
    }

    delay(500);
}
This code reads the sensor’s resistance and calculates pressure based on an exponential fit.
#define VCC 3.3  // Power supply voltage
#define R_FIXED 10000  // Fixed resistor value (10kΩ)
#define ANALOG_PIN A0  // Analog pin to read sensor voltage

// Constants from experimental curve fitting
#define A_CONSTANT 20.0  // Adjust based on curve fitting
#define B_CONSTANT 0.0005  // Adjust based on curve fitting

void setup() {
    Serial.begin(9600);
}

void loop() {
    int sensorValue = analogRead(ANALOG_PIN);
    float Vout = (sensorValue / 1023.0) * VCC;  // Convert ADC value to voltage

    // Calculate sensor resistance using voltage divider formula
    float Rs = (VCC * R_FIXED / Vout) - R_FIXED;

    // Calculate pressure using exponential fit
    float pressure = A_CONSTANT * exp(-B_CONSTANT * Rs);

    Serial.print("Sensor Resistance: ");
    Serial.print(Rs);
    Serial.print(" Ohms, Pressure: ");
    Serial.print(pressure);
    Serial.println(" kg");

    delay(1000);  // Wait 1 second before next reading
}
Pressure Sensor with LED
// C++ code
//
int sensor = 0;

void setup()
{
  pinMode(A0, INPUT);
  pinMode(8, OUTPUT);
  Serial.begin(9600);
}

void loop()
{
  sensor = analogRead(A0);
  if (sensor > 300) {
    digitalWrite(8, HIGH);
  } else {
    digitalWrite(8, LOW);
  }
  Serial.print("sensor = ");
  Serial.println(sensor);
  delay(100); // Wait for 100 millisecond(s)
}
6. Conclusion
The MD30-60 Thin Film Pressure Sensor is a high-performance force-sensitive resistor capable of detecting forces up to 20kg. Using Arduino, you can integrate this sensor for applications like touch interfaces, force measurement, and automated controls.
Key Takeaways:
- Resistance decreases with increasing force, as seen in the datasheet curves.
- Fast response time (<1ms) makes it ideal for real-time measurements.
- Requires a voltage divider circuit for proper interfacing.
- Calibration is necessary for accurate force estimation.
- The sensor is durable (>1 million cycles) and works within -20°C to 60°C.
By leveraging these features, you can develop innovative applications with the MD30-60 pressure sensor!
Pingback: Smart Street Light using Arduino and PIR Sensor - TechKnowLab