GUI for Arduino DC Motor: DC motor control is a frequent project task, and one method is utilizing a Python GUI. This blog post delves into controlling a DC motor through a Python GUI, offering live speed adjustments and direction changes. Additionally, it incorporates an input field for users to specify the COM Port and presents the GUI with appealing colors.
Python GUI for DC Motor Control
To accomplish this, we’ll utilize an Arduino board and a Python script. The Arduino board links to the DC motor, while the Python script communicates through the COM Port to control it. With the Tkinter library in Python, we’ll create a GUI, providing users with options to easily adjust the motor’s speed and direction.
Establishing Serial Connection
Firstly, we will establish a serial connection between the Arduino board and the Python script. This will be done by prompting the user to enter the COM Port to which the Arduino board is connected. The Python script will then establish a serial connection with the board through the entered COM Port. This ensures that the Python script can communicate with the Arduino board and control the motor.
Creating GUI for DC Motor Control
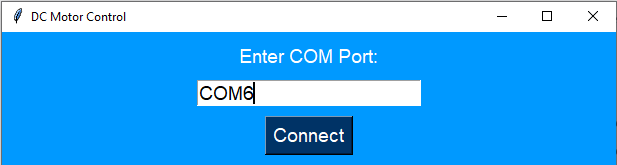
We will create a GUI window using the Tkinter library. We will configure the window with a size of 400×300 and a title of “DC Motor Control”. To make the GUI look attractive, we will set its background color to #0099ff, a light blue shade.
We will add a label for the COM Port selection and an entry field for the user to enter the COM Port. We will also add a button to connect to the selected COM Port. This will enable the Python script to establish a serial connection with the Arduino board.
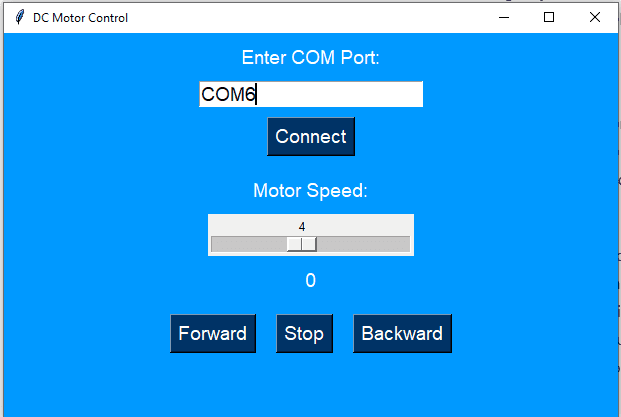
To provide the user with options to change the speed of the motor, we will add a label for speed control and a slider to control the speed. The slider will be configured to range from 0 to 9, and its current value will be displayed on a label. The speed value will be sent to the Arduino board through the serial connection.

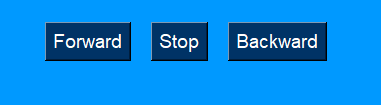
We will also add buttons for changing the direction of the motor. These buttons will be used to send commands to the Arduino board to change the motor direction. We will add three buttons for Forward, Stop, and Backward directions. These buttons will be placed in a frame with a light blue background.
Finally, we will add a function to continuously read the motor speed from the Arduino board and update the GUI. This function will run every 100ms, and it will update the speed display label with the current motor speed.
Python Code of GUI
Here’s the complete Python code for controlling a DC motor using a GUI made in Python with live speed-changing and direction-changing options:
import serial
import tkinter as tk

# create a serial connection
ser = None

# create a function to connect to the selected COM port
def connect():
    global ser
    com_port = com_entry.get()
    ser = serial.Serial(com_port, 9600)

# create a GUI window
window = tk.Tk()
window.geometry("400x300")
window.title("DC Motor Control")
window.configure(bg="#0099ff")

# create a label for the com port selection
com_label = tk.Label(window, text="Enter COM Port:", font=("Arial", 14), fg="white", bg="#0099ff")
com_label.pack(pady=10)

# create an entry field for the com port selection
com_entry = tk.Entry(window, font=("Arial", 14), width=20)
com_entry.pack()

# create a button for connecting to the selected COM port
connect_button = tk.Button(window, text="Connect", font=("Arial", 14), fg="white", bg="#003366", command=connect)
connect_button.pack(pady=10)

# create a label for the speed control
speed_label = tk.Label(window, text="Motor Speed:", font=("Arial", 14), fg="white", bg="#0099ff")
speed_label.pack(pady=10)

# create a slider for the speed control
speed_slider = tk.Scale(window, from_=0, to=9, orient=tk.HORIZONTAL, length=200, command=update_speed)
speed_slider.pack()

# create a function to update the motor speed
def update_speed(val):
    speed = int(speed_slider.get())
    ser.write(str(speed).encode())

# create a label for the speed display
speed_display = tk.Label(window, text="0", font=("Arial", 14), fg="white", bg="#0099ff")
speed_display.pack(pady=10)

# create a function to read the motor speed and update the display
def read_speed():
    speed = ser.readline().decode().strip()
    speed_display.configure(text=speed)
    window.after(100, read_speed)

# create buttons for changing motor direction
direction_frame = tk.Frame(window, bg="#0099ff")
direction_frame.pack(pady=10)

forward_button = tk.Button(direction_frame, text="Forward", font=("Arial", 14), fg="white", bg="#003366", command=lambda: ser.write(b'F'))
forward_button.pack(side=tk.LEFT, padx=10)

stop_button = tk.Button(direction_frame, text="Stop", font=("Arial", 14), fg="white", bg="#003366", command=lambda: ser.write(b'S'))
stop_button.pack(side=tk.LEFT, padx=10)

backward_button = tk.Button(direction_frame, text="Backward", font=("Arial", 14), fg="white", bg="#003366", command=lambda: ser.write(b'B'))
backward_button.pack(side=tk.LEFT, padx=10)

# start reading the motor speed
window.after(100, read_speed)

# start the GUI loop
window.mainloop()
The code showcases DC motor control through a Python GUI using the tkinter library. The GUI features a speed-adjusting slider, direction buttons for motor movement, and an entry option to input the COM Port number for establishing a serial connection with the Arduino board.
Work of “Connect()” function
Initially, we import essential libraries like tkinter, serial, and time. The code defines a connect() function to establish a serial connection with the Arduino board, based on the COM port provided by the user in the GUI’s entry field. This function reads the COM port value and utilizes it to create a serial object set at a baud rate of 9600.
Creating Main GUI Window
Next, the code initializes the GUI window with tk.Tk(), configuring its size, title, and background color. It then adds a label and entry field for COM port selection, a button for connecting to the chosen port, a label and slider to control motor speed, a display for current speed, and buttons for changing motor direction.
Other Functions
We create the function update_speed() to handle motor speed updates when the user moves the slider. The function retrieves the slider’s current value, converts it to an integer, and then sends this value to the Arduino board through the serial connection.
We create the function read_speed() to fetch the current motor speed from the Arduino board and refresh the speed display label in the GUI. It utilizes the readline() method of the serial object to read incoming data, decoding it from bytes to a string. The function is scheduled to run every 100 milliseconds through the after() method of the window object.
Lastly, the code initiates the read_speed() function and enters the GUI main loop using the mainloop() method of the window object. This main loop listens for user input events and updates the GUI display accordingly. Clicking the direction buttons triggers a lambda function, sending the corresponding command to the Arduino board through the serial connection.
Pingback: Why stepper motor is better than DC motor? - steppermotor.net