As we know that a cooling fan is a device used to dissipate heat generated by electronic components or machinery by increasing airflow. In market cooling fan comes in various sizes and RPM capacities. In India, a 80mmX80mmx10mm size, 12V DC cooling fan costs INR 80 – INR100 (approx. USD 1). I decided, to make a low cost 3D printed fan using a small DC Motor. In this article, I am going to explain how I designed and 3D printed cooling fan. I will show you the working of this cooling fan.
About Cooling Fan
A cooling fan is a device used to dissipate heat generated by electronic components or machinery by increasing airflow. It consists of a motor attached to blades or impellers that rotate to push air in a specific direction. Cooling fans are commonly found in various applications such as computers, automobiles, HVAC systems, and industrial machinery.
Here are some primary functions and applications of cooling fans:
Temperature Regulation: One of the primary functions of a cooling fan is to regulate the temperature of electronic components. Many devices generate heat during operation, which can reduce performance or even damage the components if not dissipated efficiently. Cooling fans help prevent overheating by drawing heat away from these components.
Preventing Thermal Damage: Overheating can lead to thermal damage to sensitive electronic components such as CPUs, GPUs, and power supplies. Cooling fans help maintain safe operating temperatures, thus extending the lifespan of these components and reducing the risk of failure.
Improving Performance: In devices like computers and gaming consoles, cooling fans enable the hardware to operate at optimal temperatures, which can result in better performance and stability. This is particularly important during demanding tasks such as gaming or video rendering, where components may generate a significant amount of heat.
Industrial Applications: In industrial settings, cooling fans are used in various machinery and equipment to prevent overheating and ensure smooth operation. They are essential in applications such as power generation, manufacturing, and transportation.
Components Needed
To make this low cost DIY cooling fan following parts/components are needed:
| S.No. | Item Name | Detail | Quantity | Affiliate Link |
| 1 | 3D Printed Structure | blades and motor housing | 1 | |
| 2 | Small DC Motor | 3-6V, 3000RPM | 1 | Buy |
| 3 | Wires | 1m | ||
| 4 | 9V DC Power supply/Battery | 1 | Buy | |
| 5 | Glue/Adhesive | 1 | Buy |
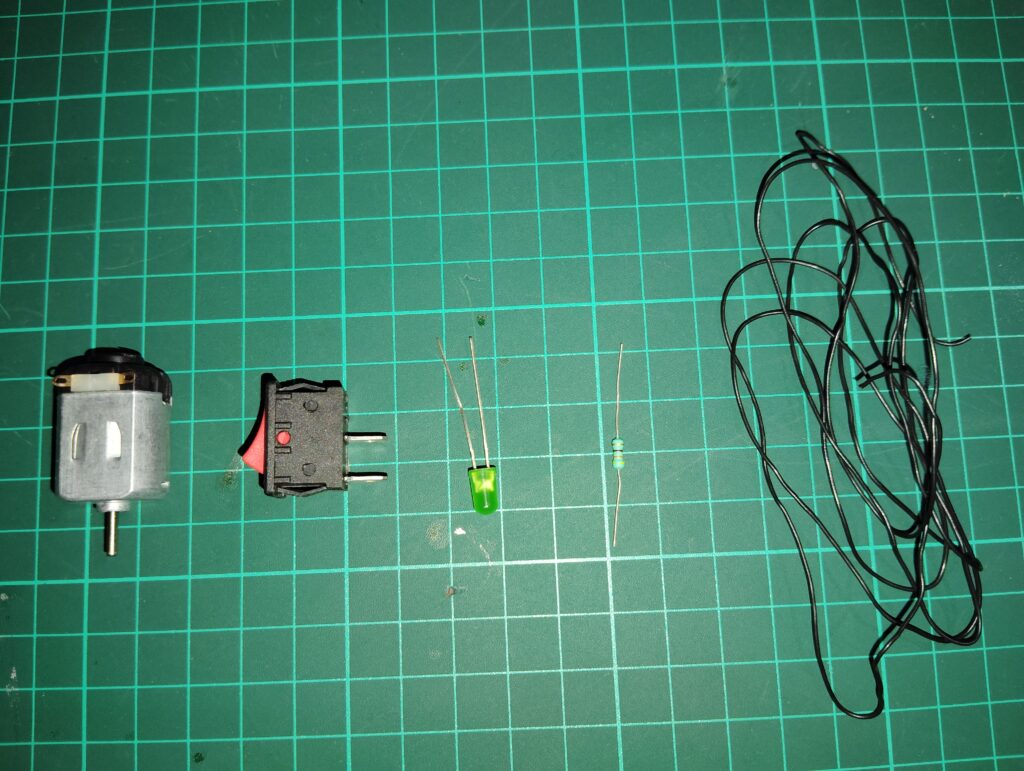
Above mentioned components are sufficient to make the cooling fan alone. However, I have made a cooling fan control panel also, that is why following extra components may also required:
- ON – OFF Switch
- LED
- Resistor
After collecting all these components, we will start the fabrication process for making a low cost 3D Printed Cooling Fan.
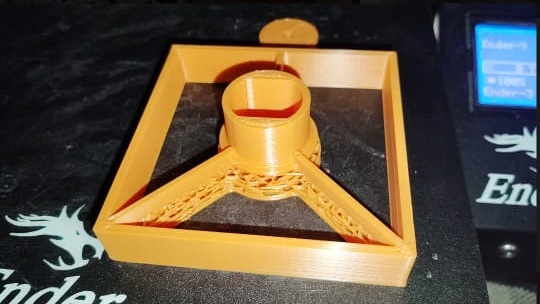
3D Printed Cooling Fan Part Printing
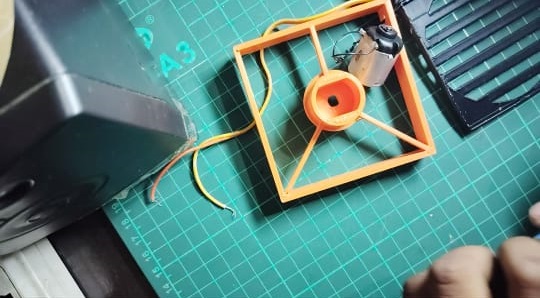
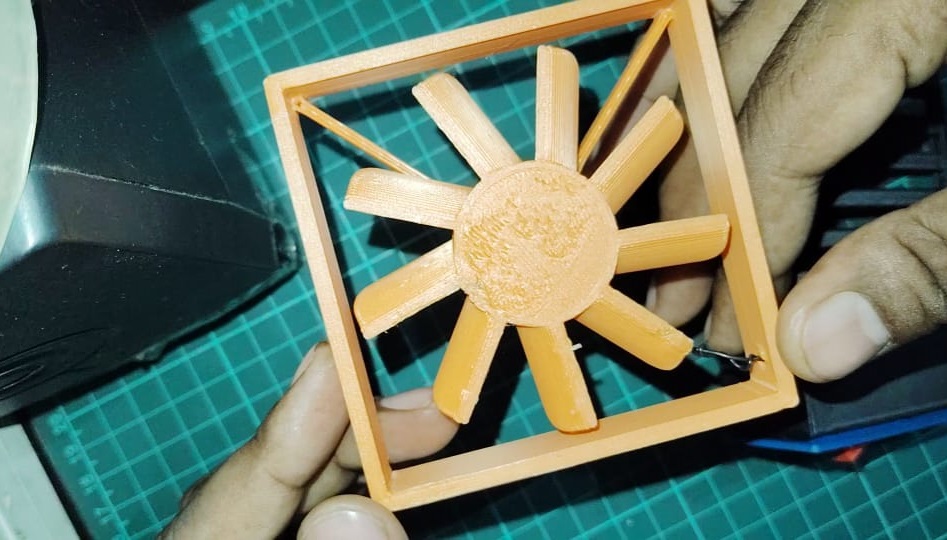
In the developed 3d printed cooling fan the support structure in which motor has been mounted is 3D printed. Apart from that, I also fabricated the blades/propellers a using FFF 3D printing technique. I have used polylactic acid (PLA) material to make all these parts.
I have designed all the parts in Fusion 360 and then conevrt them into STL format for 3D Printing. If you need 3D CAD model/STL files of these parts you can comment below. I will provide you all the files.
I have displayed all the 3D printed parts below.

Assembly – 3D Printed Cooling Fan
I collected all the 3D printed parts and the electronics item as mentioned in the above table and make the proper connection and assembly.
Soldering and Wire Connection
First I have to solder the wires in all the electronics item to make the proper circuit as shown in image below.
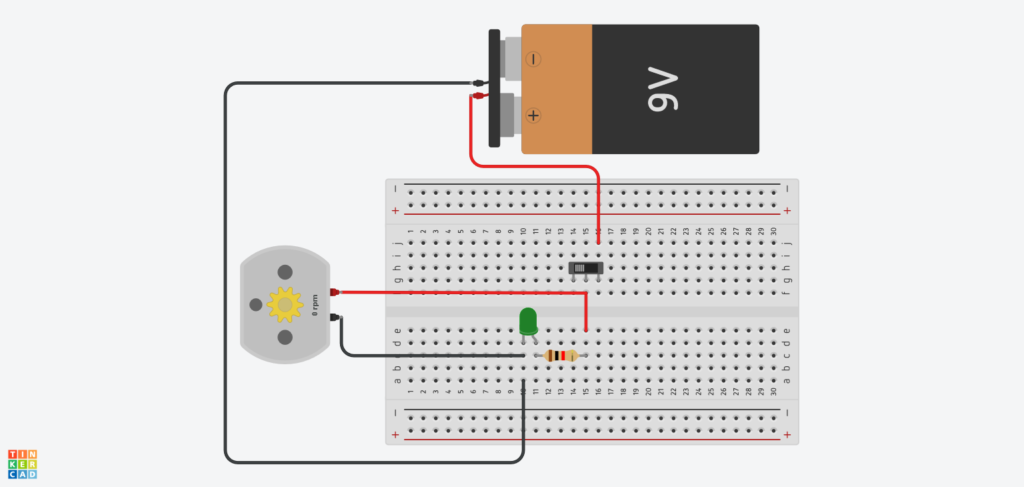
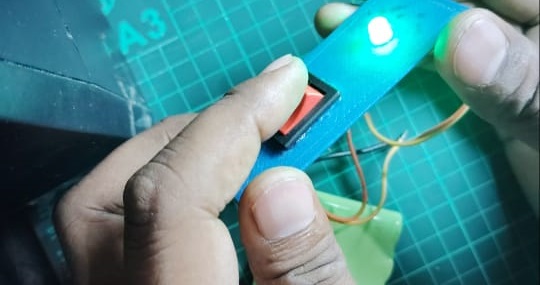
I installed the the ON-OFF switch and LED (Indicator) at their places on the control panel structure. After that I started soldering the wire according to the circuit diagram. After soldering the wires in proper sequence and place, I rechecked and validated if circuit is correct or not.

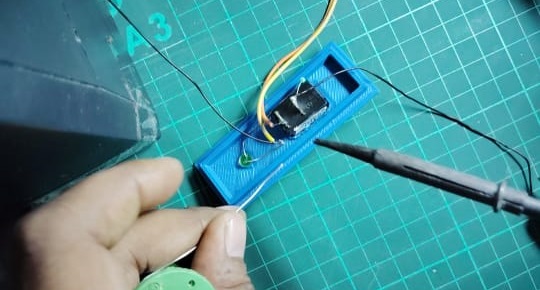
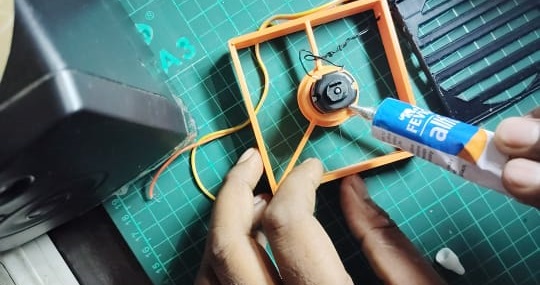
When I found that every thing is okay then I installed the motor in its housing in the support structure and applied the glue for proper bonding.
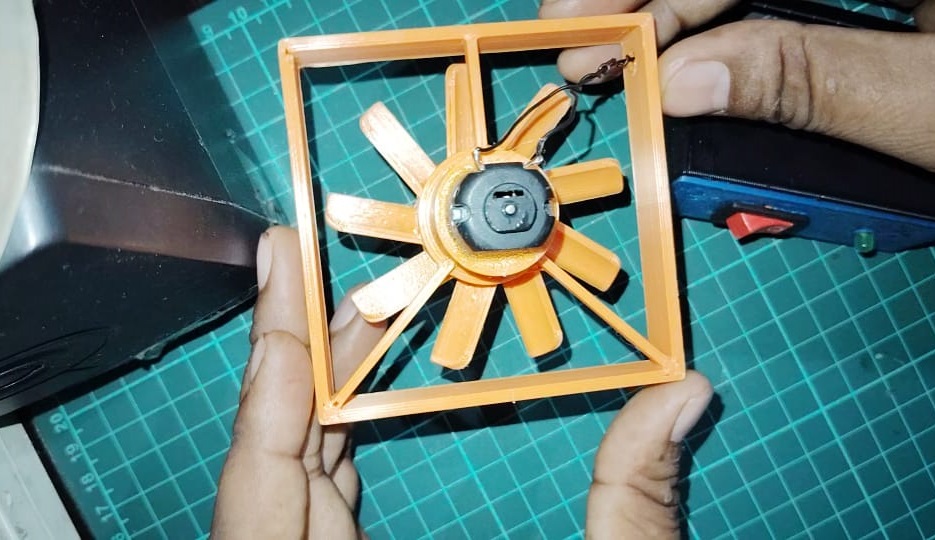
after installing the motor, I installed the 3D printed cooling fan blade or propeller on the shaft of Dc motor using adhesive material.
Working
After making assembly and circuit of this 3D printed cooling fan, I plan to check its working. To switch on the fan, I have attached a 9V DC power source across the wires of this newly made cooling fan. You can see the performance of this fan, in the video below.
I am going to use this fan in my next project that is – DIY Soldering Fume Extractor. I think, it is providing RPMs/Speed to extract the soldering fumes away from the user.
Conclusion
What do you think about this 3D printed cooling fan, please let me know in the comment box. In my next blog, I am going to compare the cost and performance of this cooling fan with the cooling fans available in the market.
Download Files
If you want to download the STL files of the parts used in this article, then you can follow the given links:
If you enjoyed reading and found this blog useful, you can motivate me to bring such more content by buying me a cup of coffee.
Thanks for reading this blog. Happy Tinkering!